To use the stationery to it's fullest capacity you may need to make a few minor adjustments to the default settings in Outlook Express.
The areas covered are: (These are links to areas on this page)
Setting The Default Email Client.
If you use more than one Email program then this step is optional. For example you may use Incredimail and Outlook for sending and receiving Emails. If so then you have the choice of selecting the default Email program. If you opt to use Incredimail as you default then you can skip this step.
If you want Outlook to be the default then follow these steps: (Words in blue are the commands displayed on the toolbar)
- Click on TOOLS | OPTIONS | GENERAL
- At the bottom of the window that is now showing, make sure that both the OE Mail Handler and News Handler are set to be the default.
(If they are currently set at the default these buttons will be grayed-out. If this is the case then you need do nothing more) - If they aren't greyed-out, click them to set them to the default and APPLY the change.
- Click OK
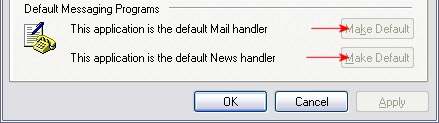
Figure1: Setting Default Mail Handler.
This is where we will tell Outlook to handle the way mail is sent.
- Click On TOOLS | OPTIONS | SEND.
- Insure the box 'Reply to messages in the format in which they were sent' is unchecked
- APPLY the change.
- Click OK.
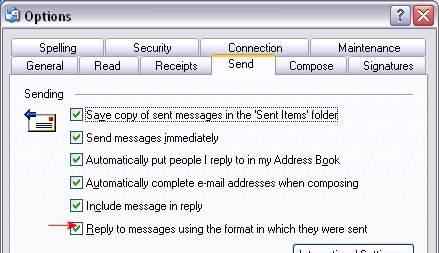
Figure 2: Setting The Send Message Format
Compose Message Formatting.
We need to tell Outlook how to format the messages that we write.
If we want to use fancy stationery when we send letters then we need to set the default format to HTML (Hyper Text Markup Language).
It is OK to use this format even for letters not written on fancy stationery.
- Click on the CREATE MAIL button.
- When the compose window appears,
- Click on FORMAT
- Select RICH TEXT(HTML) to set HTML mode.
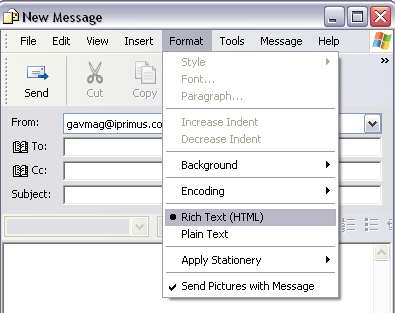
Figure 3: Setting The Default Message Format
Have you ever wanted to know how the stationery you are going to use will look when it is sent.
This is how you can set Outlook up to allow you to do it.
- Click on the VIEW button on the toolbar
- Ensure SOURCE EDIT is checked.
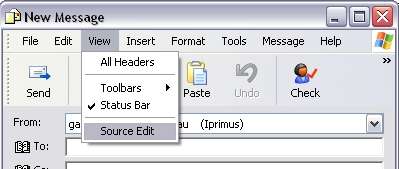
Figure4: Viewing The Source Edit Bar
Figure 5 shows what these tabs will look like

Figure 5: The Source Edit Tabs
These Tabs Explained
- The Edit Tab. It is in this area that you will type and send your letter.
- Source Tab. Will display the HTML source code of the stationery. This area is only useful if you have an understanding of what you are looking at. For most people this is an area that will not used.
- Preview Tab. Will display the stationery as it will appear when it is sent.
All Rights Reserved.